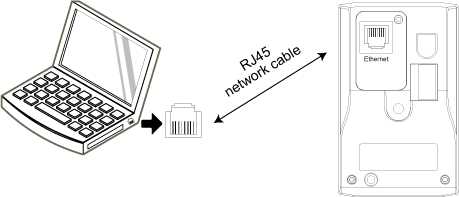
| 2-1. |
Connect the network camera to your computer via a RJ45 network cable. Make sure both of your devices are powered on. |
| |
 |
|
| 2-2. |
Select your operating system. We’ll guide you to change the IP information of your computer and access your camera by LAN later. |
| |
Windows XP, Windows Vista,
Windows 7 |
|
| 2-3-1. |
Change the IP information of your computer (For Windows XP User): |
| |
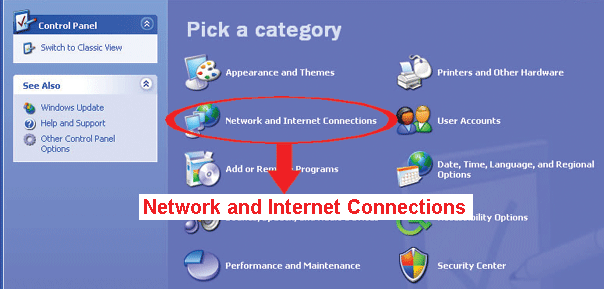
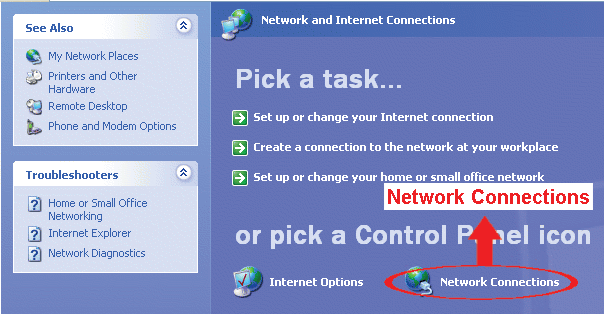
2-3-1-1.Select “start”, “All Programs”, “Control Panel”, “Network and Internet Connections”, “Network Connections” (If you’re in “Category View”). |
| |
|
|
| |
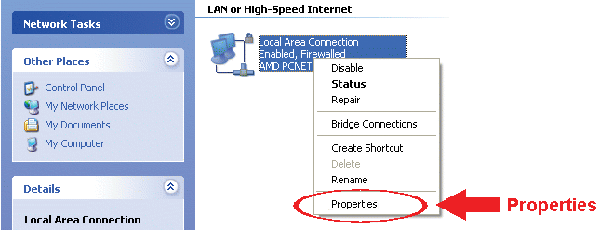
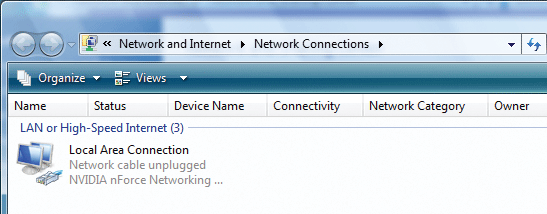
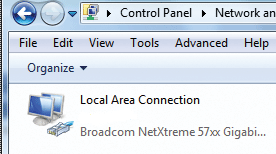
2-3-1-2.In “LAN or High-Speed Internet”, right-click on “Local Area Connection”, and select “Properties”.
Note: If the LAN connection of your computer is not enabled, enable it now. |
| |
 |
|
| |
2-3-1-3.In the “General” tab, select “Internet Protocol (TCP/IP)”, and select “Properties”. |
|
| |
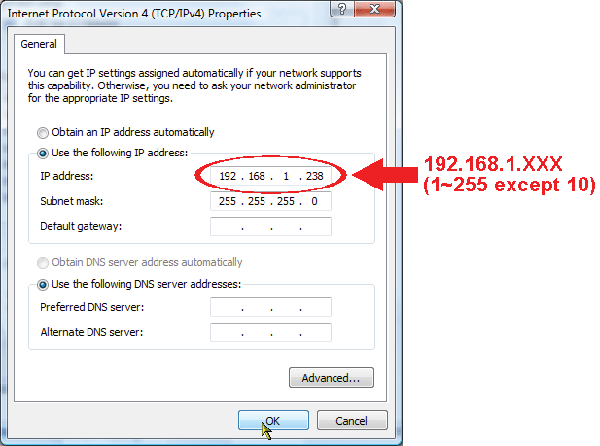
2-3-1-4.In the “General” tab, select “Use the following IP address”, and write down the current settings of your computer, you would have to recover your settings after setup your network camera. |
|
| |
2-3-1-5.Set the IP address as “192.168.1.XXX” (1~255, except 10). |
|
| |
2-3-1-6.Click “OK” to close the “Internet Protocol (TCP/IP) Properties” dialog box. Then, click “Close” to close the “Local Area Connection Properties” dialog box. |
|
| 2-3-2. |
Change the IP of your computer (For Windows Vista User): |
| |
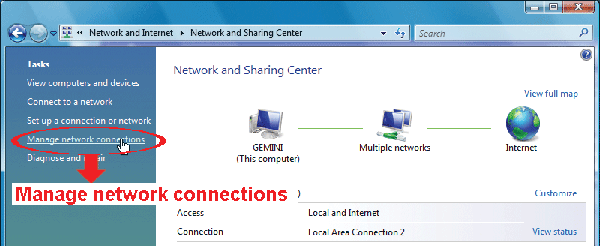
2-3-2-1. Select “ ” (start) " “Control Panel” " “Network and Internet” to enter the “Network and Sharing Center”. Then, click “Manage network connections” (If you’re in “Category View”). ” (start) " “Control Panel” " “Network and Internet” to enter the “Network and Sharing Center”. Then, click “Manage network connections” (If you’re in “Category View”). |
| |
 |
|
| |
2-3-2-2. Right-click on “Local Area Connection”, and select “Properties”. |
| |
 |
|
| |
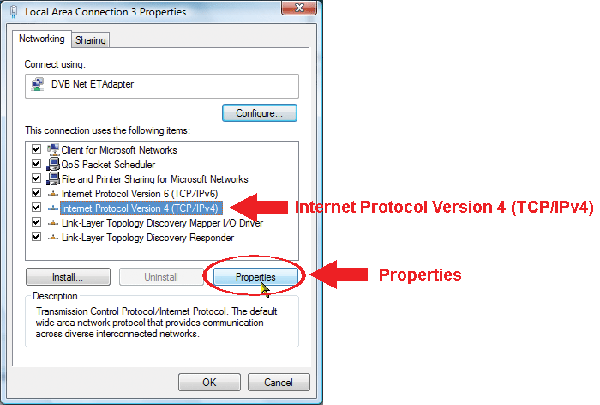
2-3-2-3. In the “Networking” tab, select “Internet Protocol Version 4 (TCP/IPv4)”, and select “Properties”. |
| |
 |
|
| |
2-3-2-4.In the “General” tab, select “Use the following IP address”, and write down the current settings of your computer. You will need to recover your settings after camera configurations are completed. |
|
| |
2-3-2-5. Set the IP address as “192.168.1.XXX” (1~255, except 10). |
| |
 |
|
| |
2-3-2-6. Click “OK” to close the “Internet Protocol Version 4 (TCP/IPv4) Properties” dialog box. Then, click “Close” to close the “Local Area Connection Properties” dialog box. |
|
| 2-3-3. |
Change the IP of your computer (For Windows 7 User): |
| |
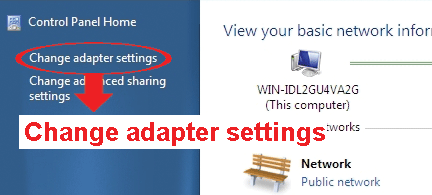
2-3-3-1. Select “” (start) " “Control Panel” " “Network and Internet” to enter the “Network and Sharing Center”. Then, click “Change adapter settings”. |
| |
 |
|
| |
2-3-3-2. Right-click on “Local Area Connection”, and select “Properties”. |
| |
 |
|
| |
2-3-3-3. In the “Networking” tab, select “Internet Protocol Version 4 (TCP/IPv4)”, and select “Properties”. |
| |
 |
|
| |
2-3-3-4.In the “General” tab, select “Use the following IP address”, and write down the current settings of your computer. You will need to recover your settings after camera configurations are completed. |
|
| |
2-3-3-5. Set the IP address as “192.168.1.XXX” (1~255, except 10). |
| |
 |
|
| |
2-3-3-6. Click “OK” to close the “Internet Protocol Version 4 (TCP/IPv4) Properties” dialog box. Then, click “Close” to close the “Local Area Connection Properties” dialog box. |
|
| 2-4. |
Access your network camera via Web Browser |
| |
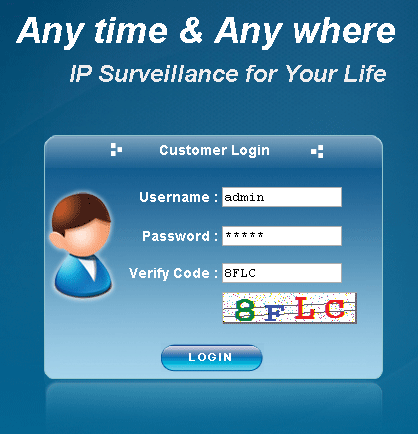
Open your web browser, such as Internet Explorer, and enter the default IP address of your network camera to access. |
| |
 |
|
| |
The default values are as follows: |
| |
Item |
Default Value |
IP address |
192.168.1.10 |
User name |
admin |
Password |
admin |
Port |
80 |
|
|